Adding LVM volumes to an EnCase case
Adding LVM volumes to an EnCase case
@bit_reader recently posted on Twitter that it seems that EnCase does not support drives with LVM2. I could’ve sworn I’ve seen EnCase display LVM data before so I decided to do a quick test.
My original idea for testing this was to check a Linux VM that I already had the EnCase agent on. Turns out finding one was harder than I expected. Turns out I didn’t have any non-production VM’s available that had the EnCase agent installed. The other option at this point was to create a VM specifically for my test and just add the VM disk to EnCase for anlysis.
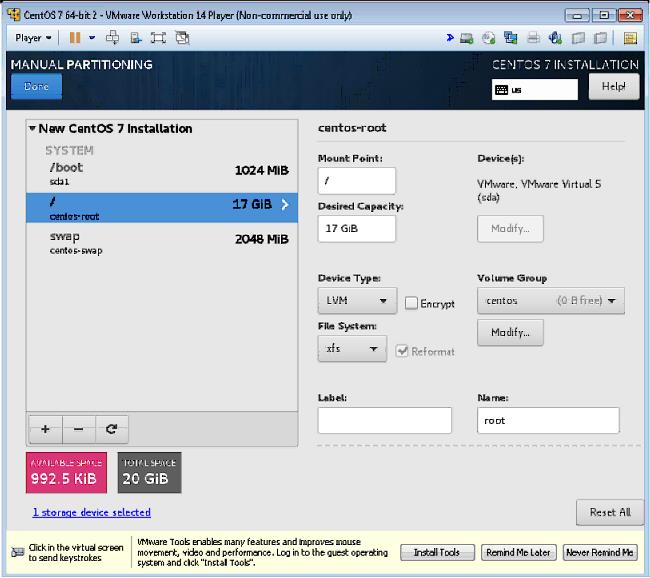
I started out by installing a new Centos 7 VM using VMWare Workstation. I used all default settings for the Centos install as the default partitioning scheme already uses LVM.
First Attempt -> Add the VMDK to EnCase directly
For my first attempt to analyze the drive, I figured I would simply just add the VMDK file to EnCase for analysis. The VMDK file is essentially the drive of the VM so I thought this may work. Turns out it didn’t.
Second Attempt -> Acquire the drive as an E01
Since the first attempt at simply analyzing the VMDK file using EnCase failed, I decided I needed to acquire the drive in a format that EnCase recognizes. Which in this case is E01. A quick internet search shows that FTK Imager has support for working directly with VMDK files.
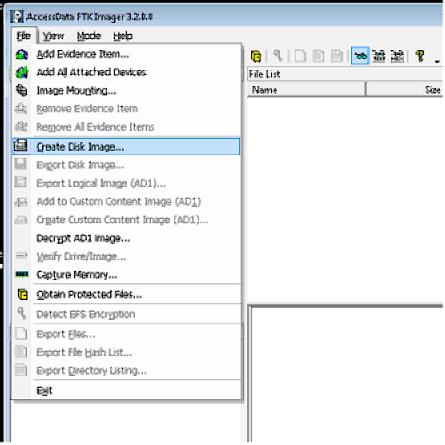
Acquisition with FTK
- Start FTK Imager
- Start the acquisition process by using the “Create Disk Image” option located under the File menu
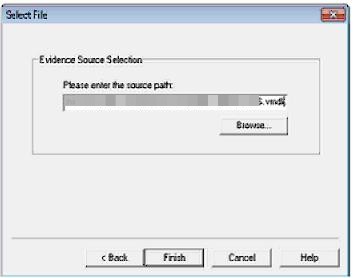
- Select Image File as the source for the acquisition. Select the VMDK file as the image file of choice.
- Click Add to create a new destination for the disk acquisition.
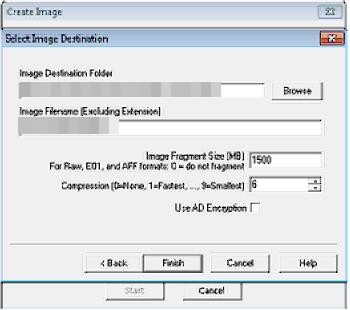
- Select E01 as the destination image type.

- Fill in your case details

- Select your file destination folder and the file name for the new E01 file you’re creating
- Make sure Verify Image is checked and click on Start to start the acquisition process
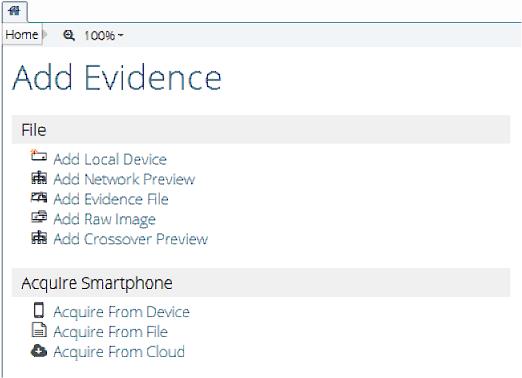
Add image to EnCase
Now that we have the drive image in a format that EnCase easily recognizes, we start up EnCase and add the newly created E01 file as evidence to our case.
- Click on Add Evidence
- Select Add Evidence File
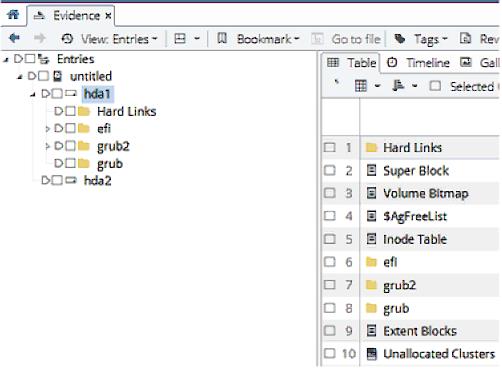
- The drive is successfully added to the evidence list. Unfortunately, you can only browse the filesystem contained on /boot. Everything else shows up as Unallocated.
- We now need to use the Scan for LVM function in order for the LVM volumes to be view-able in our evidence list. The Scan for LVM function is accessed by right clicking on the drive in the Evidence List. Selecting Device. Selecting Scan for LVM.
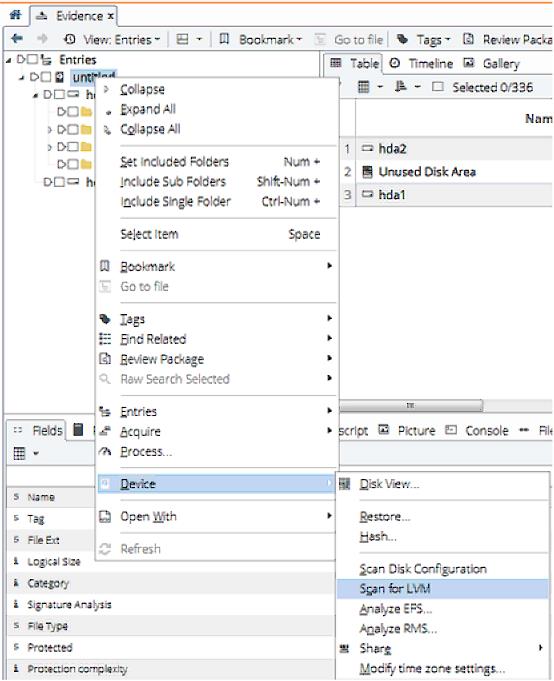
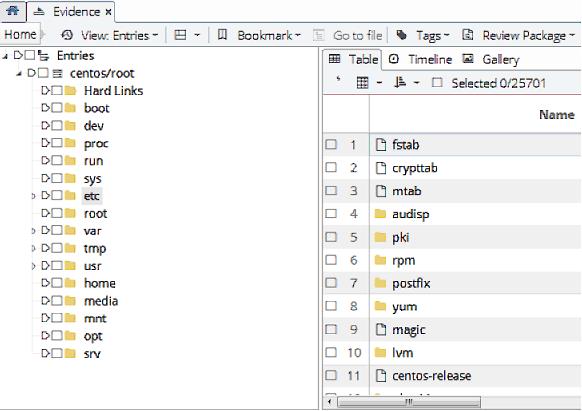
- Once the scan is completed, the LVM volumes will appear in the Evidence List.
Conclusion
EnCase doesn’t automatically parse/scan for LVM volumes when a disk is added to the Case as evidence. In order for the LVM volumes to be seen, you have to use the Scan for LVM option.
Follow up question…
@bit_reader followed up his Tweet by mentioning LVM volumes with LUKS encryption. I performed the same test described above but this time during the installation of the OS, I encrypted the drives using LUKS. Unfortunately EnCase was not able to find the encrypted volumes and I was not able to find an option to enter the password for the LUKS volumes. In the end I wasn’t able to analyze the drive using EnCase. If someone knows how to do it, I’d be very happy to learn your tricks.